How to build a simple Serverless App to Send a Text Message
The Summoner (summoner.purpleriver.dev) allows you to summon anyone to your location via text message. However at its core it leverages several AWS services to send a text message from a website.

The Summoner was built as a learning exercise, and while building it I found that there were no basic guides on how to achieve this simple functionality end to end.
This blog was written for and is originally hosted on Mobilise Cloud
This blog will guide you through the process of creating a button on a web page that will send a text message to user inputted number with some custom data. There’s also a little bit of magic with html5 geolocation and Google Maps in order to get your location and “summon” a person, but I don’t go into that in this guide. Apart from buying a domain name, everything we do here is entirely free, as long as your site doesn’t send more than 100 text messages a month.
I’ve tried to take a grass roots approach here so anyone with only a basic understanding can follow along. If you feel I’ve missed anything out or if you want further explanation on anything then please let me know.
You can view the website and lambda code here on GitHub.
Contents:
- Architecture Diagram
- SNS - Create Topic
- Creating a new topic
- IAM - Create role for Lambda
- Lambda
- SNS - Create Subscription
- API Gateway
- Static Website
- DNS with Cloudflare for free SSL
Architecture Diagram
So to get started here’s a basic diagram of the application structure
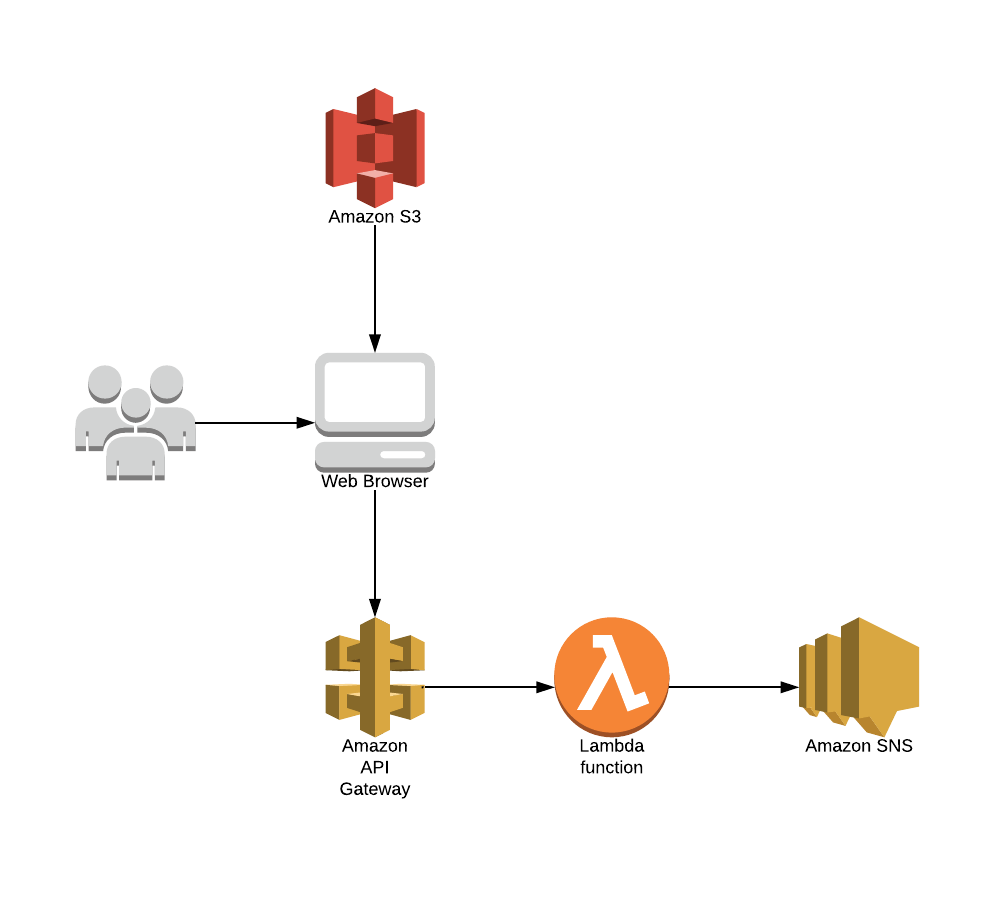
It seems pretty straight forward set up when you break it down like that.
SNS - Create Topic
Starting from the end with setting up SNS. First of all you need to make sure that you’re working in a region that supports sending SMS.
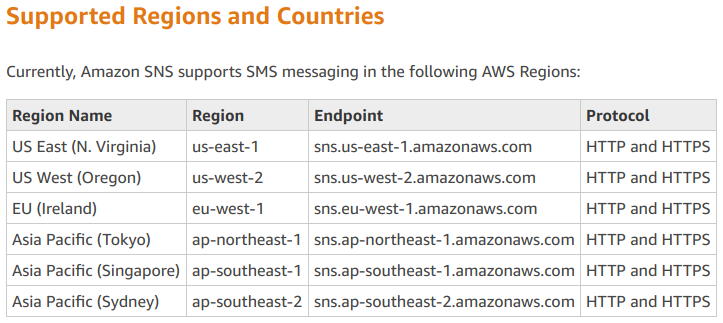
I used Ireland because it's the closest location to me geographically, but any region works fine for this.
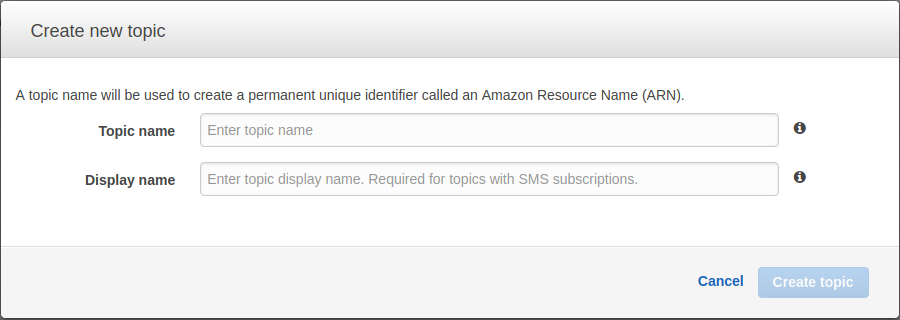
Creating a new topic
On the in the AWS console, navigate to the SNS dashboard, the click on topics. From here you can create a new topic and name it however you want.
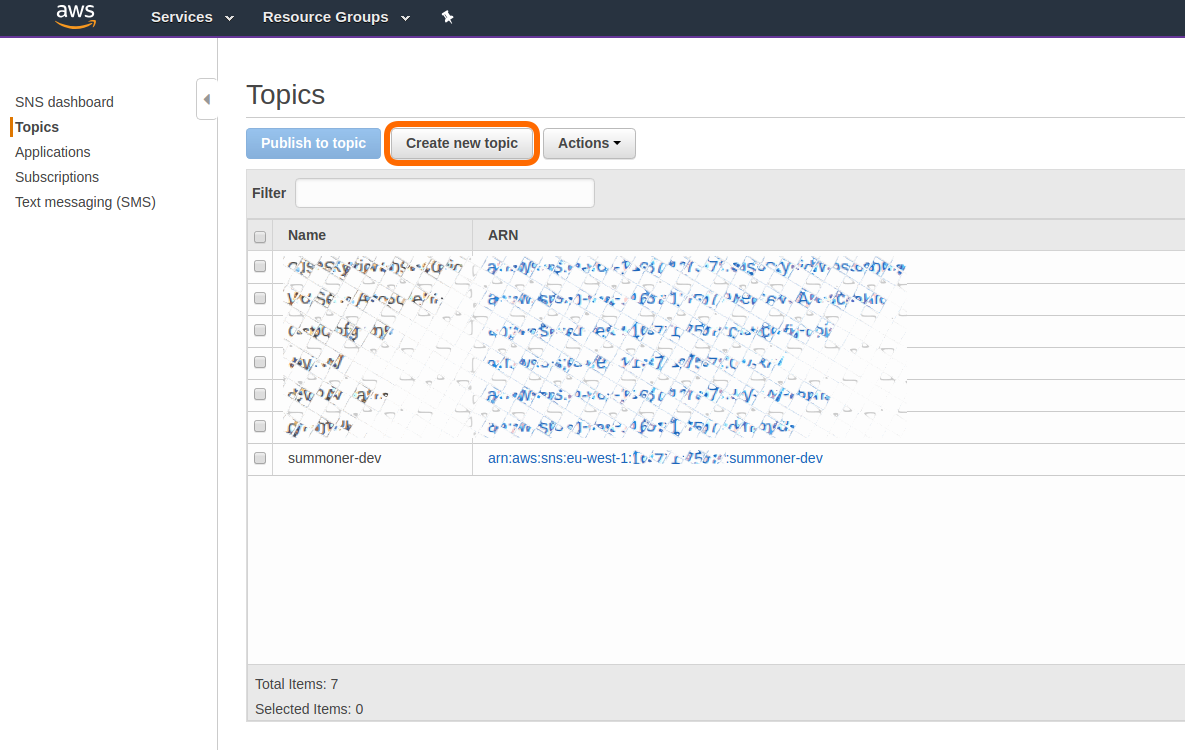
Make note of the ARN of your newly created topic, you’ll need to reference it later.
IAM - Create role for Lambda
We’re going to need slightly more than the standard execution policy for our lambda. So head over to IAM and create a new policy. We want to create a policy with the standard execution policy and then add a inline policy to give full access to SNS.
The gif below shows the process to create this role. You can (and should) be more specific with the permissions you are giving this role but for testing purposes allowing all access to SNS is fine.
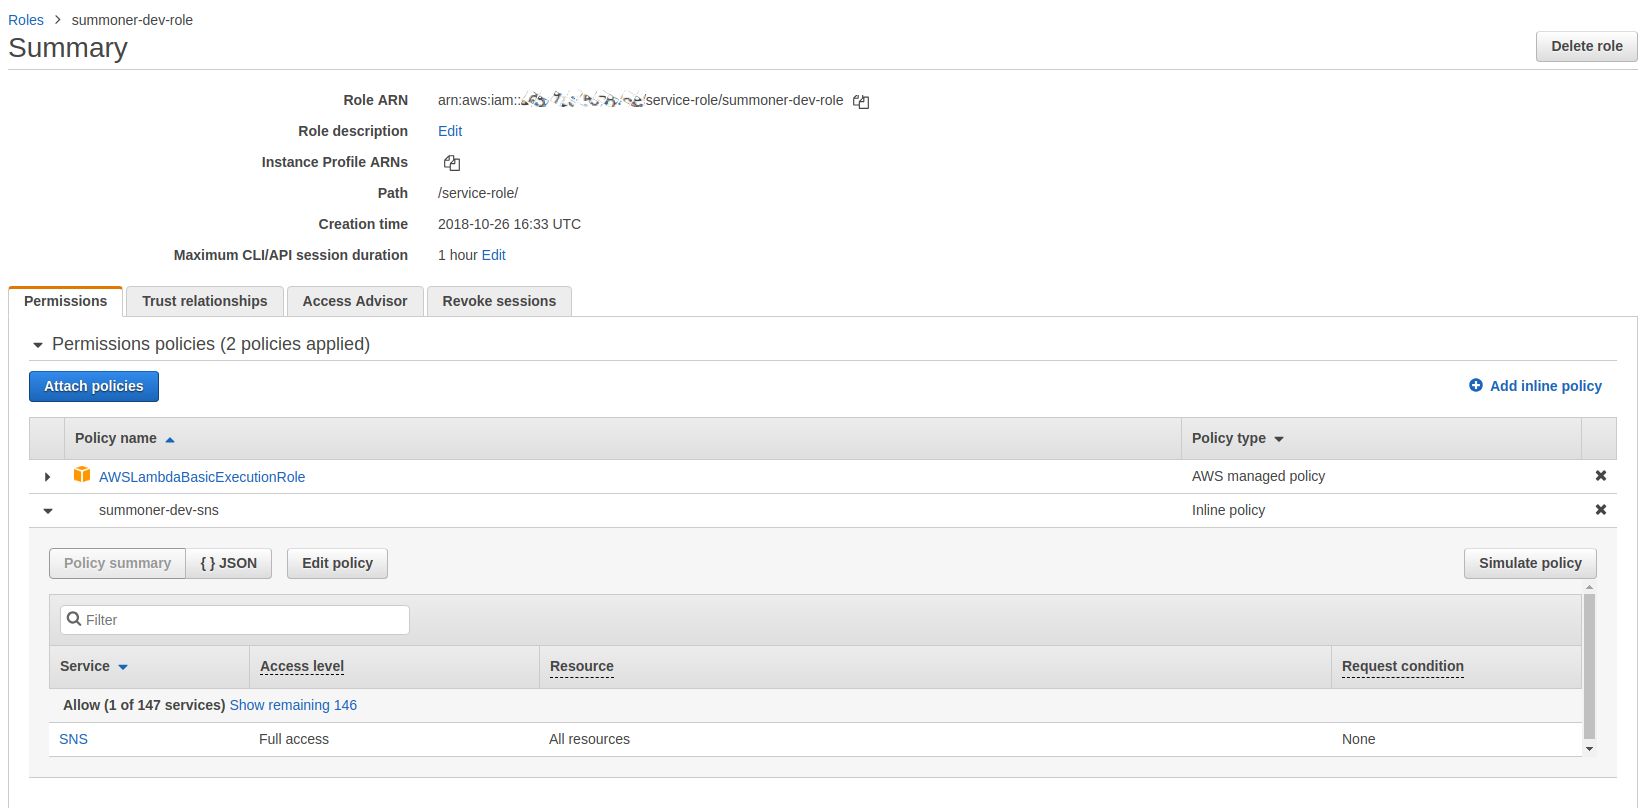
This image shows detail of what your policy should end up looking like.
Lambda
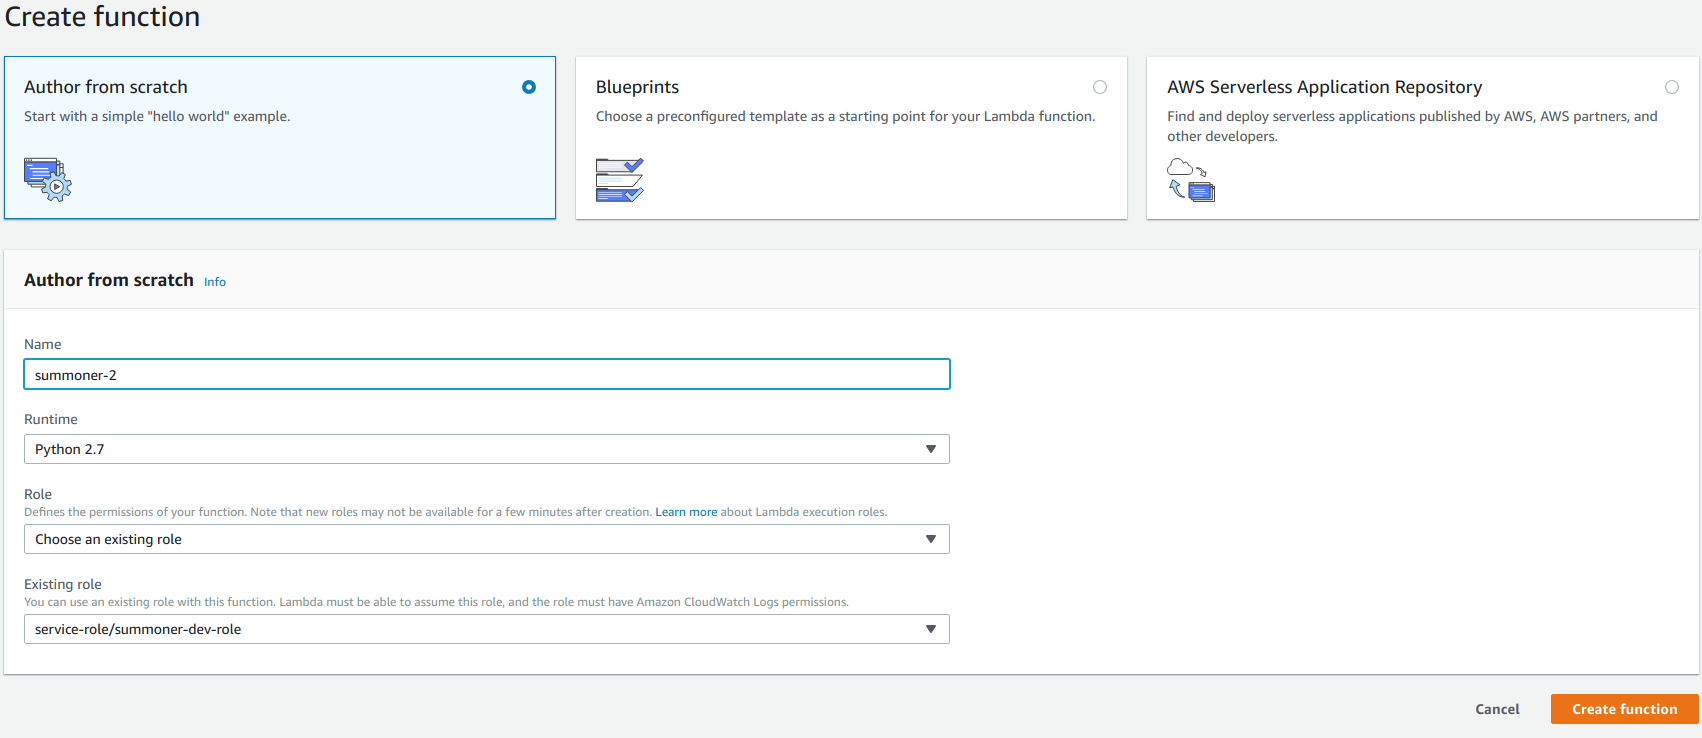
The next thing we need to do is set up our lambda function. Create a function with the language you’re most comfortable with and the role you created earlier. I’m using python 2.7.
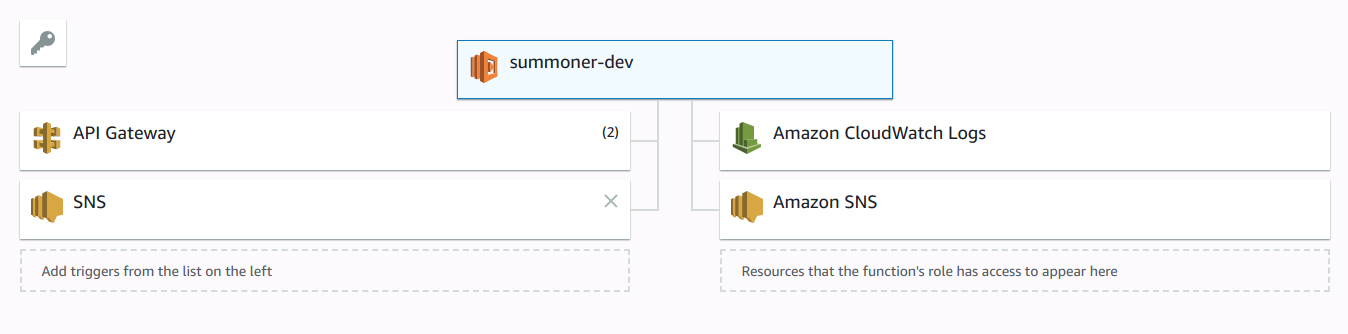
Our lambda is initially going to be triggered by API Gateway and send a request to SNS. Its then going to push response from SNS and back though API Gateway.
The triggers should look something like this:
The actual lambda function is fairly simple, we take the body sent through API Gateway, extract the information we need, form the message and send the text message. There is a lot more you can do with SNS but I’ve kept this simple.
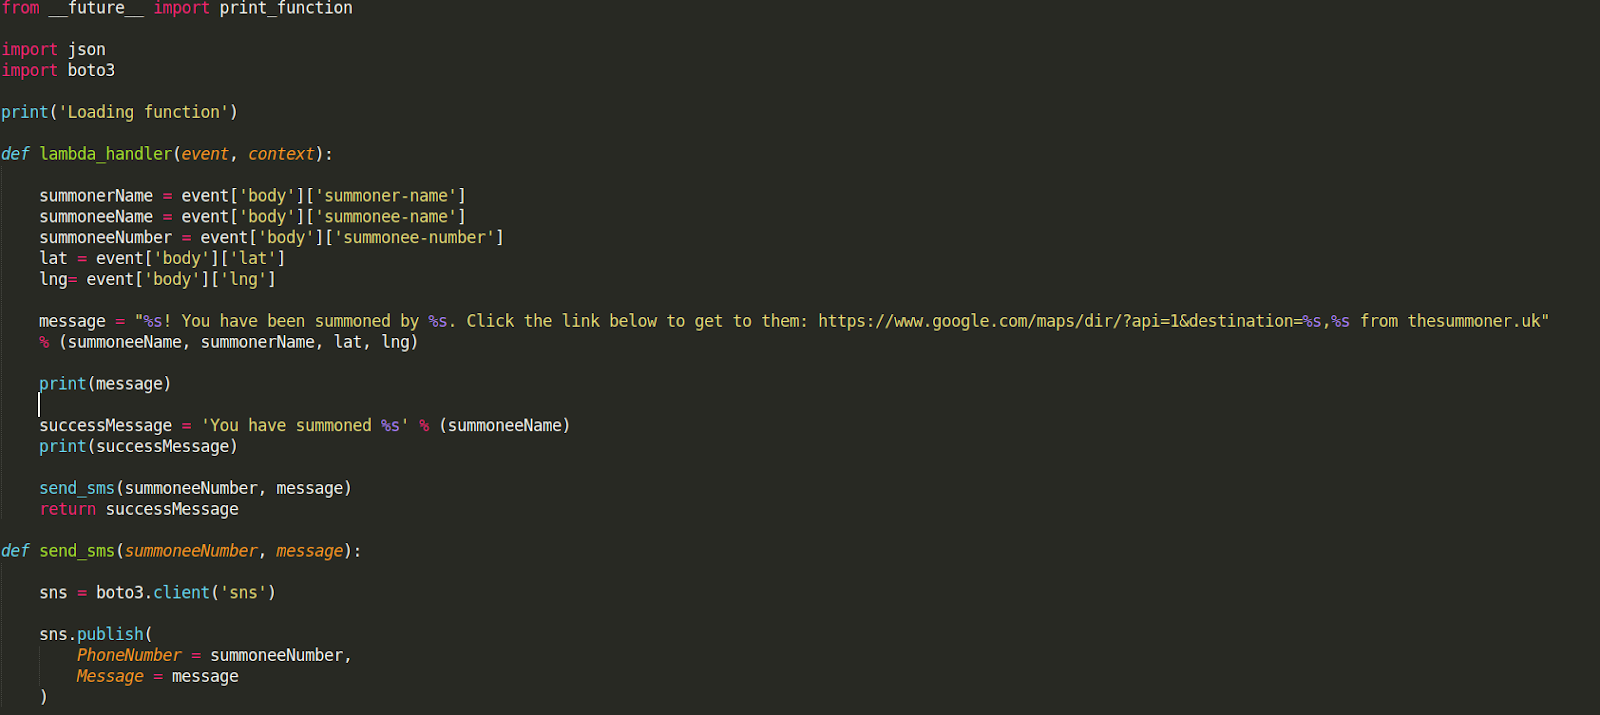
This is also available on GitHub.
SNS - Create Subscription
Once the Lambda is created we need to subscribe it to our SNS topic. Head back over to the SNS dashboard in the console then Subscriptions > Create Subscription.
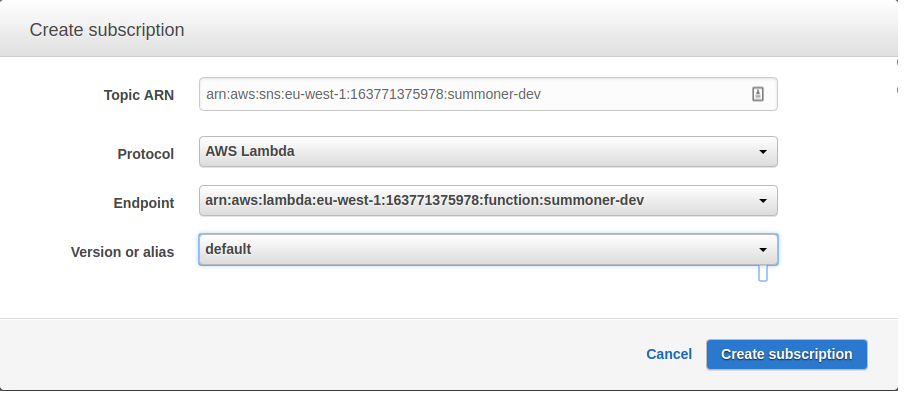
The ARN is the topic you created earlier, the protocol is “AWS Lambda” and the endpoint is the lambda function.
API Gateway
The next thing we need to do is set up our API. This is going to take HTTP requests from our website and pass them to the lambda. It’s fulfilling a single purpose so remains quite simple.
Head back to your Lambda function and your API gateway trigger should still say that it needs configuration.

Click on “Configuration required” and it should open up a dialog below:
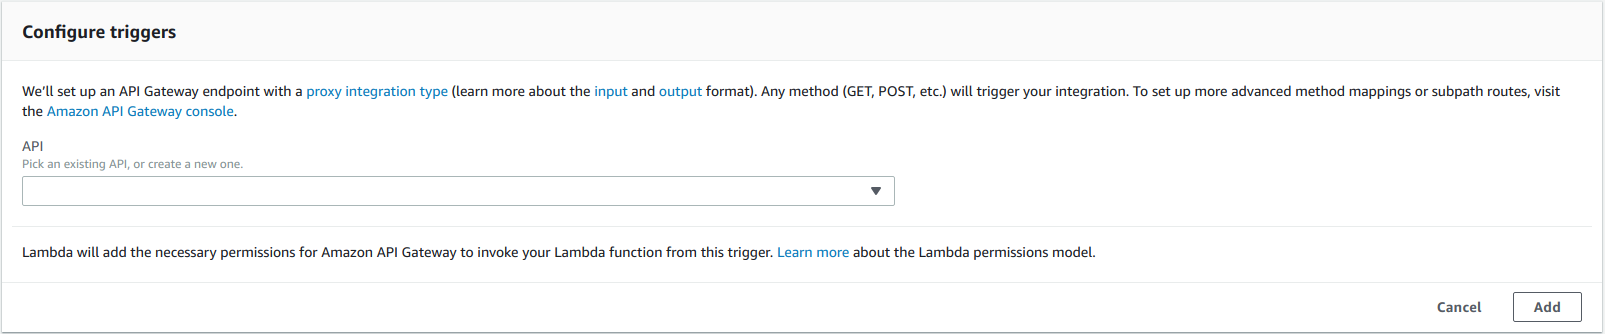
From the API Drop down select “Create a new API” with the following options.
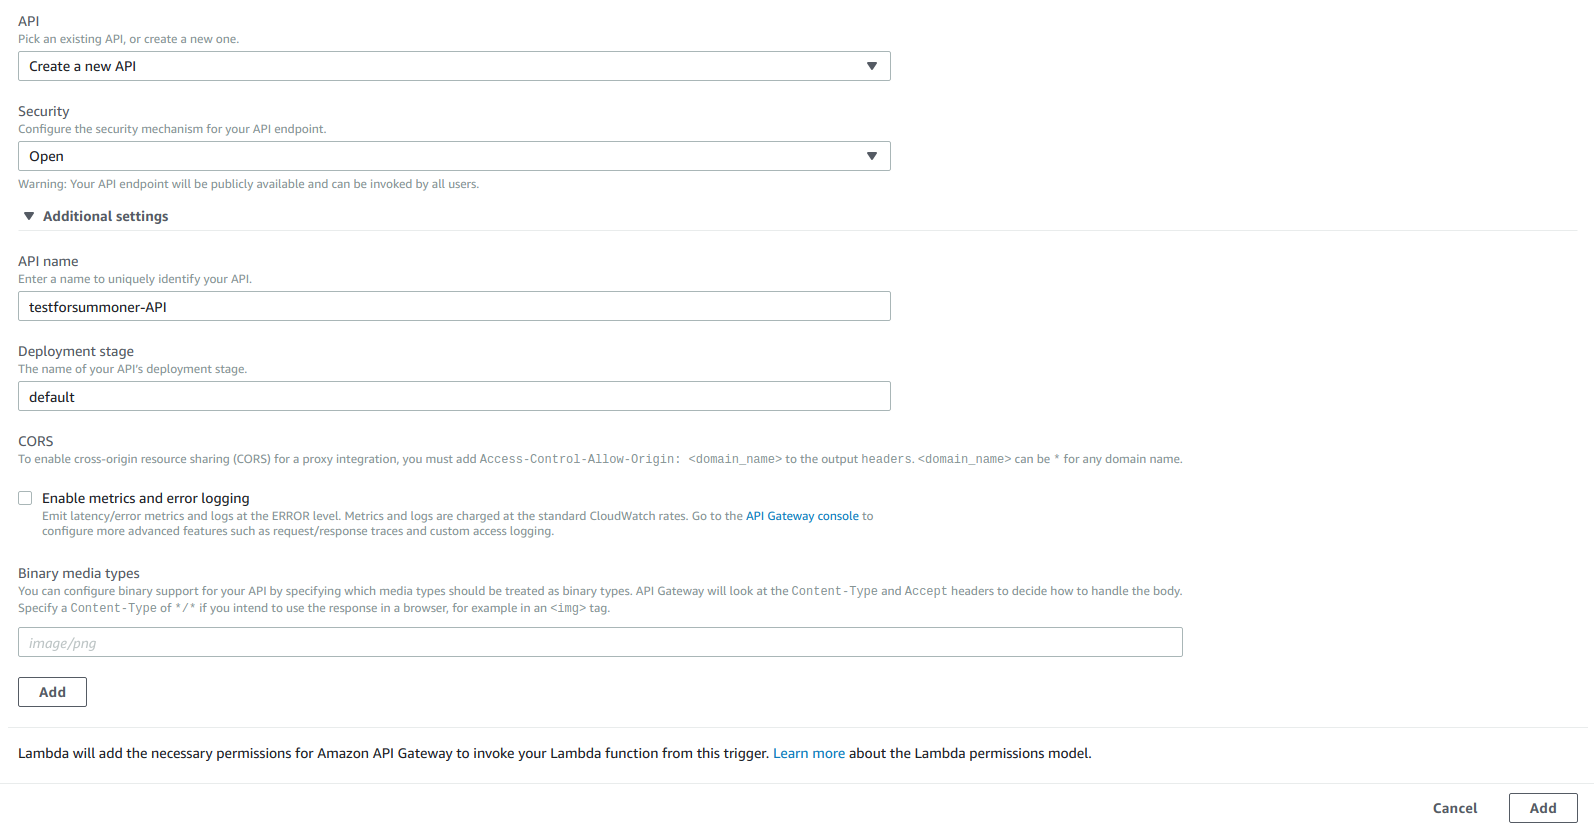
Click add and then save your Lambda via the button in the top right.
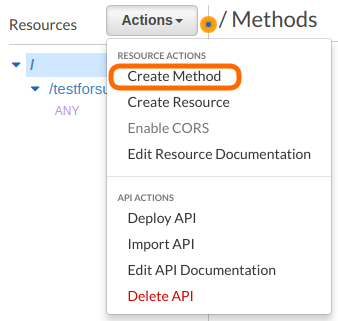
That creates a lot of the default options in our API, some of which we want to change. Once you’ve created your API via the lambda, click on its name which will take you to the API Gateway section of the console. From the root of the API click on Actions > Create Method. Select “POST” from the drop down and then hit the tick.

You’ll then be directed to the method setup page:
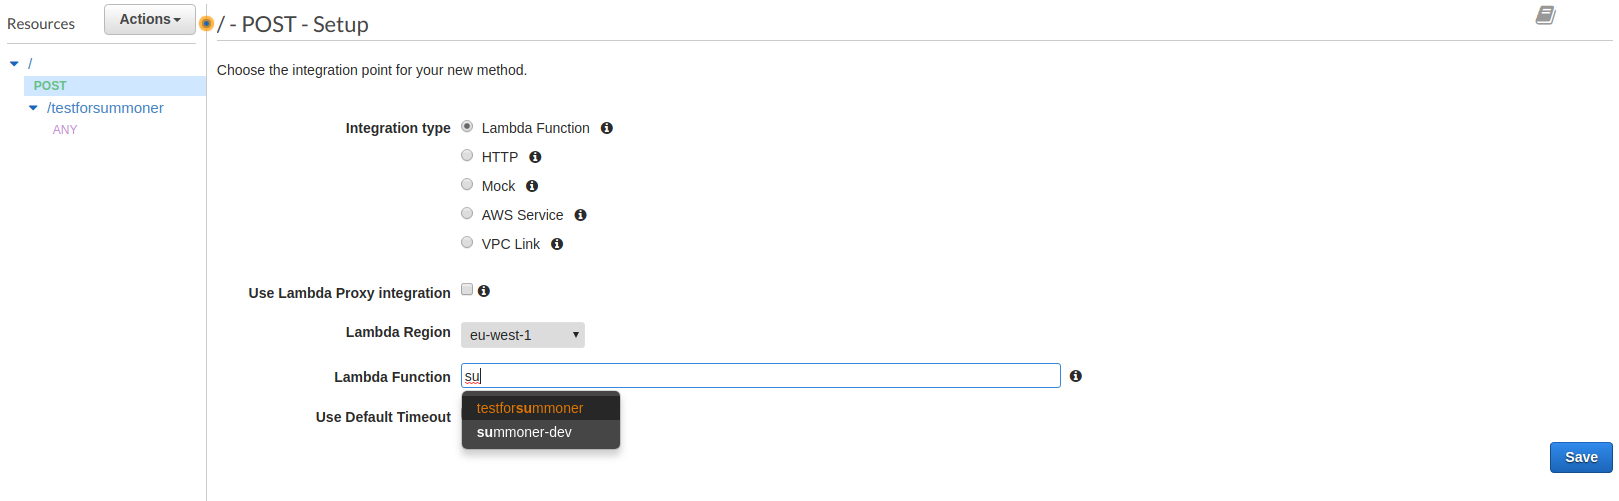
Enter the name of your lambda function and hit “Save” and then “OK” in the next dialog to allow API Gateway to invoke your lambda.
The next step is to click on “POST” in the resource tree, then Actions > Enable CORS
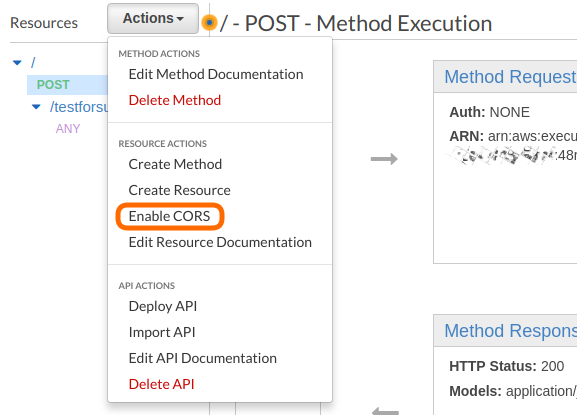
CORS stands for Cross Origin Resource Sharing and allows websites from any domain to access your resources. Ideally this should be turned off or set to specifically allow cross origin requests from only your domain. For testing, enabling it fully is fine.
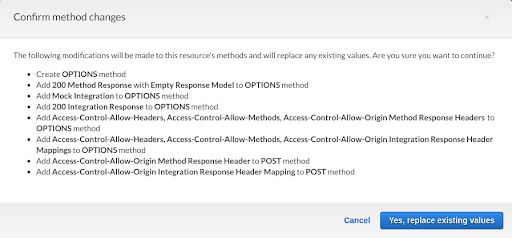
The Confirmation dialog should look like the image below.
Then you should see a confirmation like this:

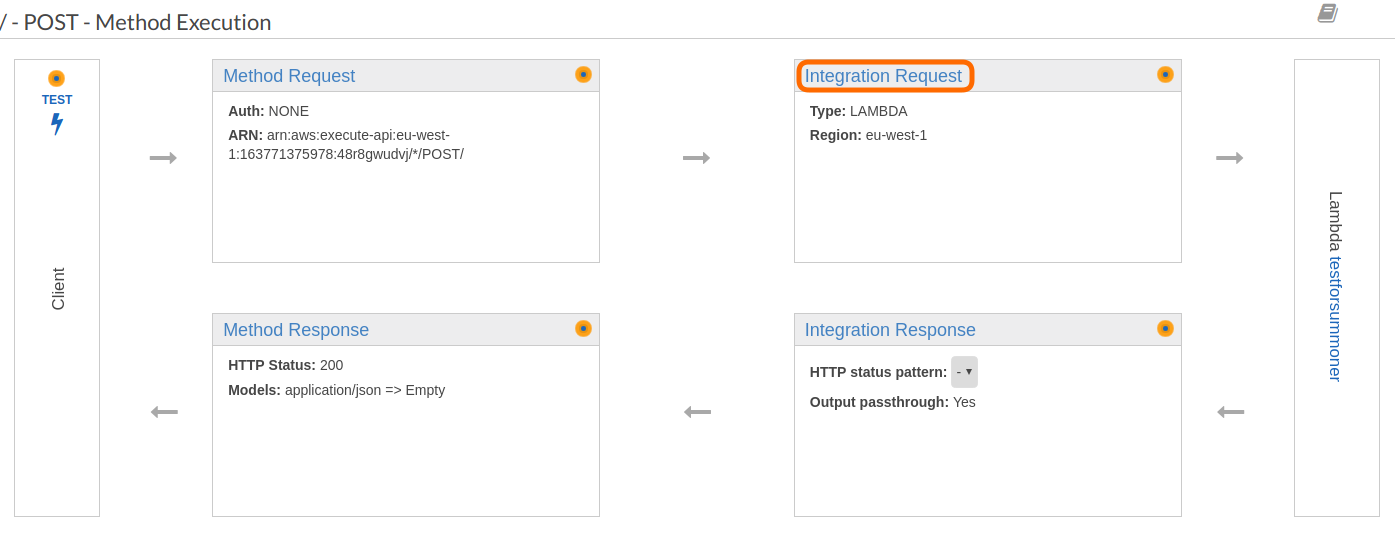
Almost there now! The last be of configuration is that we need the integration request to pass our JSON from the post request through to the lambda. Click back on the post request and then on the “Integration Request” header.
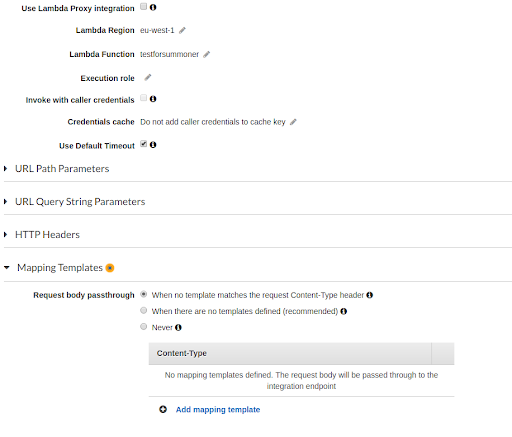
From the Integration Request page, scroll down and expand the “Mapping Templates” Section, then click “Add mapping template”
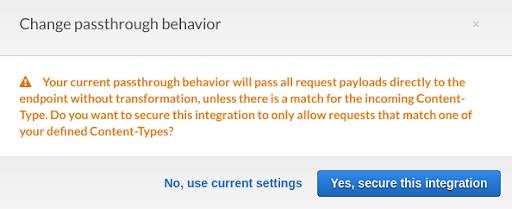
We want to add a template for “application/json” which is the same as the placeholder. Enter “application/json” and hit the tick.

Confirm in the next dialog.
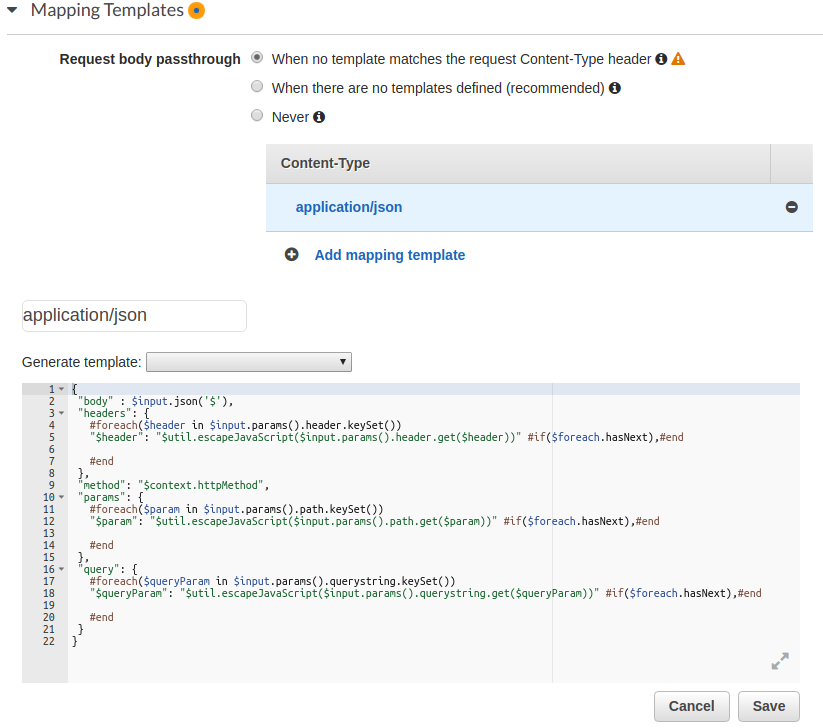
The enter the following code and save.
        {
            "body" : $input.json('$'),
            "headers": {
                #foreach($header in $input.params().header.keySet())
                "$header": "$util.escapeJavaScript($input.params().header.get($header))" #if($foreach.hasNext),#end

                #end
            },
            "method": "$context.httpMethod",
            "params": {
                #foreach($param in $input.params().path.keySet())
                "$param": "$util.escapeJavaScript($input.params().path.get($param))" #if($foreach.hasNext),#end

                #end
            },
            "query": {
                #foreach($queryParam in $input.params().querystring.keySet())
                "$queryParam": "$util.escapeJavaScript($input.params().querystring.get($queryParam))" #if($foreach.hasNext),#end

                #end
            }
        }
It should end up looking like this:
Finally we need to deploy our API. Click on Actions > Deploy API. In the following stage set the deployment stage to default and click “Deploy”
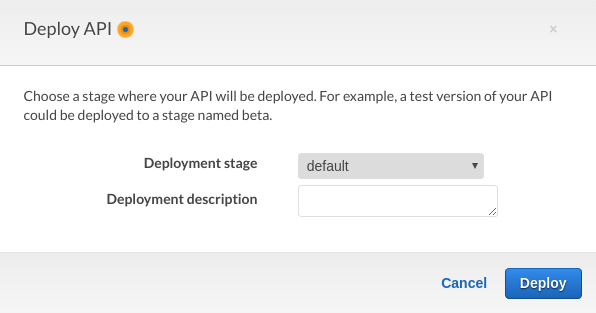
This will give you an Invoke URL which is what we need for our next step.
Thats it, thats our API Gateway set up!
Static Website
There are a couple of bits to the website. We have the HTML and CSS of course and then there are two javascript functions.
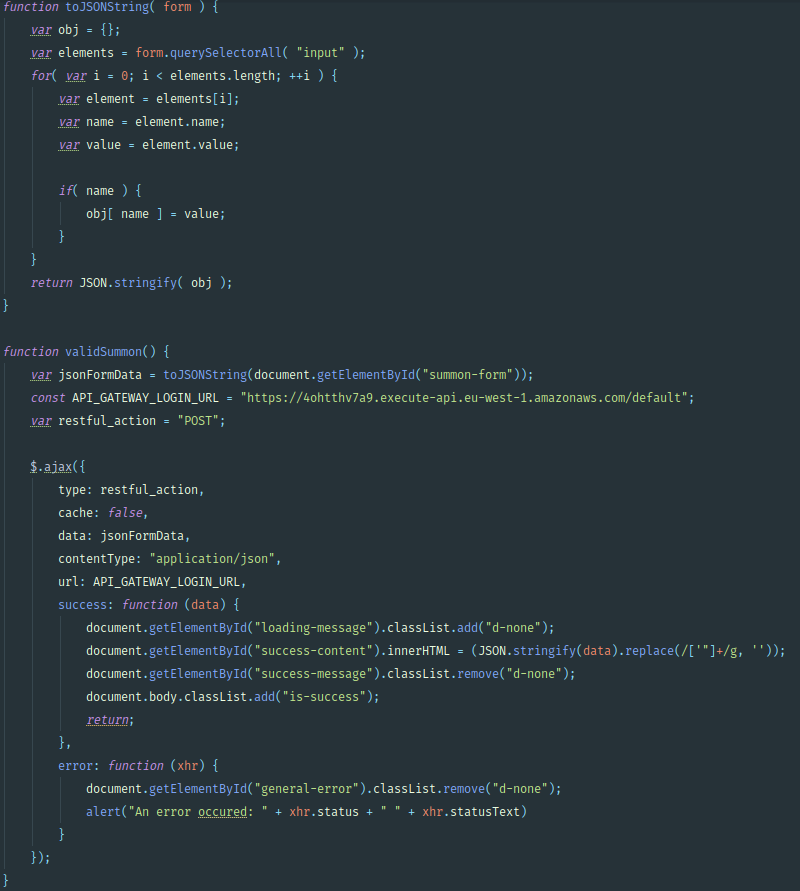
One short one which gets the user location from the browser - more on this later. The other which handles what happens when the “Summon” button is clicked. The summon function does some basic validation which I won’t go into here, but you can check it out on GitHub.
Once the validation has passed, the “validSummon()” function is called. This calls a custom function to convert the form data to a JSON string. We then use ajax to create a POST request with the data from our form.
The website itself is simple to host in an S3 bucket.
The one caveat with this is that in order to get the user’s location we need to be requesting it from a HTTPS site. In order to do that I moved the domain to Cloudflare which offers a free flexible SSL service.
DNS with Cloudflare for free SSL
The first step is to buy a domain from Route 53. This needs to exactly match the bucket name that you’re using for the static hosting. For example https://thesummoner.uk has a bucket called thesummoner.uk, were as https://www.thesummoner.uk would need a bucket called www.thesummoner.uk. Once you have purchased your domain and the registration has completed, Route 53 will set up a hosted zone for you. Add an A record set that is an alias and points to your bucket. This will take a bit of time to propagate. While it is, head over to Cloudflare and set up an account, its all free.
On Cloudflare you want to add a site, and as long as the DNS record has propagated from Amazon fully, Cloudflare will pull across the record sets. If it hasn’t don’t worry we can add them manually.
Once the site has created, copy the name servers from Cloudflare and head back over to Route 53. Firstly make a note of the resource that the A-record is pointing to, then delete the hosted zone, as these are only free for a short period of time. You’ll need to delete the record set you created before you can delete the overall zone. Then in the Registered Domains section change the name servers from Amazon’s to Cloudflare’s.
With route 53 these propagate fairly quickly, so head back on over to Cloudflare and refresh the page. Hopefully everything has gone green. If Cloudflare couldn’t pick up on the DNS records before you transferred the domain, add a CNAME record for the bucket. If there is no subdomain use “@” to indicate the root domain.
The final step is to head over to the Crypto tab on Cloudflare and toggle “Always use HTTPS” to on and there you have it!
Any questions drop me an email or comment on the Mobilise blog.